Thursday, September 30, 2021

A Friend Like You

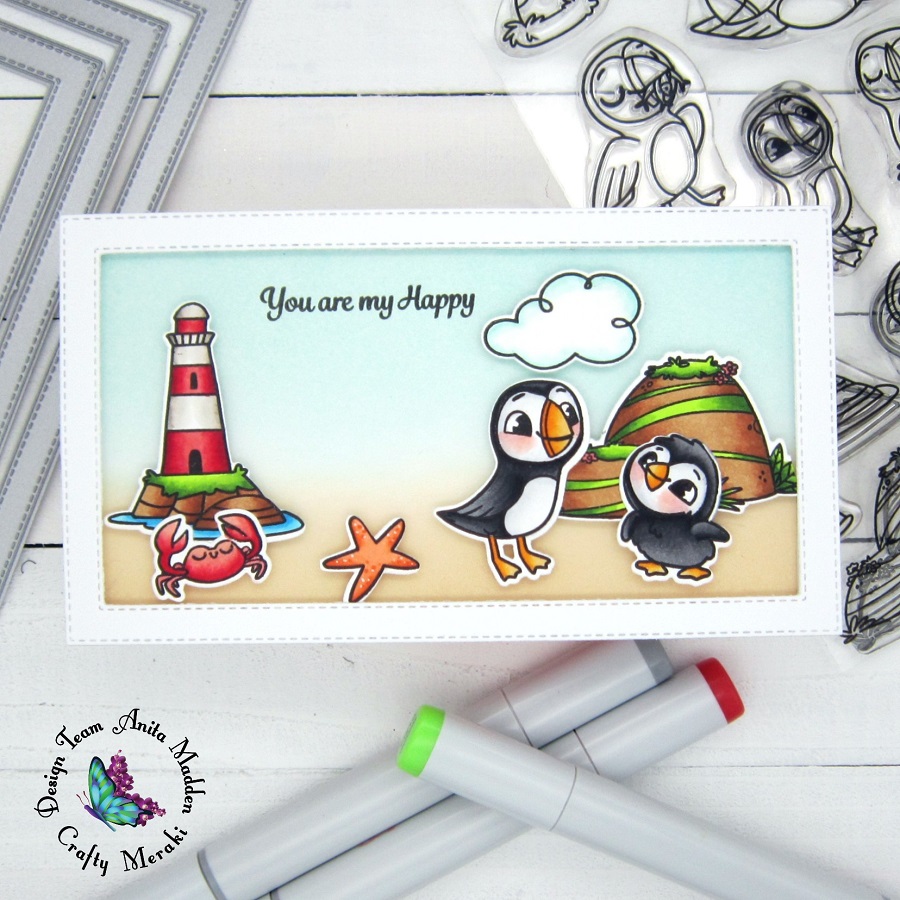
Good morning friends!  Today I'm sharing a card featuring some of the newer products from the Crafty Meraki Mini Release! 

My mini slimline card measures 3.5" x 6.5" and it cut from white cardstock.  I used the Mini Slimline Round The Block Die to cut a panel from white cardstock and adhered it to my card.  I used the Rachel Flora Para-Dies to diecut three flowers from white cardstock and then colored them with my copics.  I adhered the flowers to my card with foam tape.  I heat-embossed a sentiment from the MFT Weather With You stamp set and adhered it to my card with foam tape.

Thanks so much for stopping by.  Have a fantastic day!

Hugs, Anita

Monday, September 27, 2021

Happy Halloween

Happy Monday friends!  Today I'm sharing a mini slimline Halloween card featuring stamps by Paperie Ink.  


These sweet little ghosts, BOO balloon, and the tombstone are from the My Boo stamp; the pumpkins, bat, and sentiment are from the Oh Bats stamp set.  My mini slimline measures 3.5" x 6.5".  I sponged Lawn Fawn Yeti ink onto a piece of black cardstock using the MFT Mini Cloud Edges Stencil.  I stamped all the images onto Neenah cardstock, colored them with copics, and then fussy-cut them.  I diecut a circle from white cardstock and sponged it with distress inks to create the moon.  I used a grass die to diecut a strip of grass from black cardstock and inked the edges with the Lawn Fawn Yeti ink.  I adhered the grass and the colored images with foam tape to add some dimension to my card.

Copics:
Ghosts - BG13, BG11, BG10
Pumpkins - YR18, YR14, YR12, Y15; E44, E43, E42
Boo Balloon - V15, V12, V01, V000
Tombstone - C5, C3, C1; G99, G94
Bat - C5, C3, C1, C0

Thanks so much for stopping by.  Have a wonderful week!

Hugs, Anita

Saturday, September 25, 2021

Happiest of Holidays

Good morning!  I'm back again today guest designing for Joy Clair Designs!  Today I'm sharing a card featuring a an adorable Santa from their latest release.

This Santa and sentiment are from the Love Santa Digital Stamps.I printed the image on Neenah cardstock, ran it through my ScanNCut, and colored it with copics.  I used a stitched rectangle die to diecut some Christmas pattern paper for the front of my card.  Next, I diecut a stitched oval from bristol card and sponged it with distress oxide ink.  I spattered the oval with thinned white acrylic paint and adhered it to my card.  I adhered a snowy slope on the oval with foam tape, and then adhered my Santa with foam tape also.  I printed one of the sentiments from the stamp set, matted it onto green cardstock, and adhered it to my card. I used a white gel pen to add highlights and added Nuvo Crystal Glaze to Santa's buckle, buttons, and blades on his skates.  I added a few tiny stars for embellishment.

Copics:

Skin - E13, E11, E21, E00, E000

Beard, Fur Trim - C3, C1, C0

Santa Suit - R37, R35, R32

Buttons - C7, C5, C3

Buckle - Y28, Y26, Y23

Skates - C5, C3, C1

Thanks so much for stopping by.  I hope you have a fabulous weekend!

Hugs, Anita

Thursday, September 23, 2021

Smile

Good morning friends!  Today I'm sharing a card featuring some of the newest products from the Crafty Meraki Mini Release! 


My mini slimline card measures 3.5" x 6.25".  I sponged Weathered Wood Distress Ink on the front of my card and spattered it with water.  Once dry, I spattered it with gold metallic paint.  I used the new Frame-Worthy Mini Slimline Die to cut a frame from white cardstock.  

I stamped the large floral image from the Reason To Smile stamp, ran it through my ScanNCut, and colored it with copics.  I stamped the sentiment and heat-embossed it with gold embossing powder.  I adhered the flowers, frame, and sentiment with foam tape.

Copics:

Flowers - R32, R30, R00; V12, V01, V000

Greenery - G28, B24, G20; BG75, BG72, BG70; YG67, YG63, YG61

Berries - BG13, BG11, BG10

Thanks so much for stopping by.  I hope you have a fabulous day!

Hugs, Anita

Wednesday, September 22, 2021

Have A Holly Jolly Christmas

Good morning friends!  I'm popping on here today to share a sweet Christmas card using stamps by Evelin T Designs


These cute little penguins are from the Fun In The Snow stamp set.  If you love penguins and other ice-skating critters then you really need to go check out this stamp set.  I stamped the image on Neenah cardstock, ran it through my ScanNCut, and colored it with copics.  I added some Glamour Dust to the red hat.  I diecut a topper and a bow for the top of my card and sponged some distress ink on the front of my card.  I adhered the penguins with foam tape and then stamped one of the sentiments from the stamp set.  This was a very quick and easy card and would be great for mass-producing your Christmas cards!

Thanks so much for stopping by!

Hugs, Anita  

Monday, September 20, 2021

Spooky

Good morning friends!  Today I'm sharing a fun mini slimline Halloween card featuring stamps from Paperie Ink

My mini slimline measures 3.5" x 6.5".  I cut a piece of colorful striped paper and adhered it to my card base.  Next, I diecut a three-window frame from black cardstock and I cut three pieces of bristol card to place behind the windows.  I sponged the bristol with Wilted Violet, Twisted Citron, and Peacock Feathers Distress Oxide Inks.  I spattered the inked squares with both black and white acrylic paints and then adhered the diecut piece to my card.

I stamped the images, ran them through my ScanNCut, and colored them with copics.  I used a black glaze pen on the critter's eyes and noses and applied Nuvo Crystal Glaze to the lollipop.  I adhered the images with foam tape.

Copics:

Pumpkins - YR18, YR14, YR12, Y15; E27, E23; G28, G24, G21

Bats - C5, C3, C1, C0

Mouse - E31, E30, E50

Cat - C5, C3, C1, C0

Hat - V17, V15, V12, V01

Lollipop - BG05, BG01

Thanks so much for stopping by!  I hope you have a fabulous week!

Hugs, Anita  

Sunday, September 19, 2021

Lucky Me

Hello friends!  Today I'm sharing a card I made for the My Favorite Things Wednesday Sketch Challenge 559.  


These adorable critters are from the Fox and Friends stamp set.  I diecut a piece of bristol card with a cloud border die, sponged it with Salvaged Patina Distress Oxide Ink, and adhered it to my card.  Next, I diecut a piece of bristol card with a grass die, sponged it with Mowed Lawn Distress Oxide Ink, and adhered it to my card.  I stamped the images onto Neenah cardstock, colored them with copics, and then fussy cut them.  I used a black glaze pen on the bears' eyes and noses and adhered them to my card with foam tape for dimension. 

Copics:
Bears - E33, E31, E30, E50; R20; E01; 100
Plane - R39, R37, R35, R32, C3, C1, C0
Scarf - B26, B24, B21
Tree - YG67, YG17, YG03, YG01
Cloud - BG10, BG000


Thanks so much for stopping by!

Hugs, Anita

Thursday, September 16, 2021

Your Next Stamp September Release Day

It's new release day for Your Next Stamp and we're celebrating over on Instagram!  

I used the Wild Birthday stamp set to make today's card.  I sponged the base of my card with Tumbled Glass and Mowed Lawn Distress Oxide Inks, then spattered it with water.  I colored all the adorable images with copics.  I used a black glaze pen on the animals' eyes and noses, and added some highlights to the balloons with a white gel pen.


Join the IG Hop at 11 am EST on 9/16/2021 for a chance to win one of the three $20 gift certificates to the Your Next Stamp Store.  Your Next Stamp is adding 11 new stamps sets and three new die sets, plus some stencils to their lineup!  The IG hop starts at the YNS' IG account. 


Thanks so much for stopping by!

Hugs, Anita

You Make Me Smile

Good morning friends!  Today I'm sharing a card featuring some of the newest dies from the Crafty Meraki Mini Release! 


My mini slimline card measures 3.5" x 6.25".  I cut a piece of bristol card, sponged it with Tumbled Glass Distress Oxide Ink, and adhered it to my card base.  I used the new Frame-Worthy Mini Slimline Die to cut a frame from white cardstock and adhered it to my card.  I diecut the three flowers from the beautiful Kelsey Para-Dies and sponged the flowers with Kitsch Flamingo, Scattered Straw, and Mowed Lawn Distress Oxide Inks.  I spattered the flowers with the same oxide ink and white acrylic paint.  I stamped one of the sentiments from the Reason To Smile stamp set and adhered the flowers with foam tape for dimension.

Thank you so much for stopping by.  Have a wonderful day!

Hugs, Anita

Wednesday, September 15, 2021

Your Next Stamp September Previews - Day 3

Good morning everyone!  I'm excited to be return as a guest designer for Day 3 of the Your Next Stamp previews for the September Release!

Today I'm featuring the new Costume Fhiona stamp set.  This stamp set is so adorable and has the cutest sentiments!  I used the YNS Stitched Rectangle Dies to diecut two rectangles from white cardstock.  I used the Simple Circles Stencil to sponge distress oxide inks onto the larger rectangle and adhered it to my card.  I colored the image with copics and then diecut it using the coordinating dies.  I sponged Peacock Feathers Distress Oxide Ink onto the smaller diecut rectangle, adhered it to my card and then adhered the image with foam tape.


Be sure to stop by the 
YNS Blog for details on all the Giveaways happening during their Previews!  The big reveal is tomorrow, Thursday, September 16, and we will be having a hop on Instagram so be sure to join us!

Thanks for stopping by!

Hugs, Anita

Tuesday, September 14, 2021

Your Next Stamp September Previews - Day 2

Good morning everyone!  I'm so excited to be guest designing for Your Next Stamp for their Previews for the September New Release!

Today I'm featuring the new Slam Dunk stamp set.  This stamp features an adorable basketball-playing bear and several different sentiments.  I used the YNS Stitched Rectangle Dies to diecut some pattern paper and also a rectangle from white cardstock.  I sponged Tumbled Glass Distress Oxide Ink on the white panel and matted it onto blue cardstock.  I also adhered the pattern paper to a card base cut from blue cardstock.  I colored the bear with copics and diecut him using the coordinating die.  I adhered the bear and sentiment with foam tape and then added a few enamel dots.  


Be sure to stop by the 
YNS Blog for details on all the Giveaways happening during their Previews!  The big reveal is Thursday, September 16, and we will be having a hop on Instagram so be sure to join us!

Thanks for stopping by!

Hugs, Anita

Monday, September 13, 2021

Your Next Stamp September Previews - Day 1

Good morning everyone!  I'm so excited to be guest designing for Your Next Stamp for their Previews for the September New Release!

Today I'm featuring the new Birthday Gnomies stamp set.  This set comes with several cute gnome images and birthday accessories and sentiments.  I colored the gnomies with copics and diecut them using the coordinating dies.  I sponged Shabby Shutters Distress Oxide Ink on bristol card to create the ground.  I used the Fluffy Clouds Stencil and Tumbled Glass Distress Oxide Ink to create the clouds.  I used a white gel pen to add highlights to the images and then adhered them to my card with foam tape.


Be sure to stop by the
YNS Blog for details on all the Giveaways happening during their Previews!  The big reveal is Thursday, September 16, and we will be having a hop on Instagram so be sure to join us!

Thanks for stopping by!

Hugs, Anita

Sunday, September 12, 2021

On Your Special Day

Happy Sunday everyone!  I'm so excited to be guest designing for Joy Clair Designs this month!  Today I'm sharing a card featuring a beautiful floral image from their latest release.


This lovely image and sentiment are from the On Your Special Day digital stamp set.  I printed the image on Neenah cardstock and then diecut a panel using a stitched rectangle die.  I colored the image with copics and then shaded around the flower with both copics and colored pencils.  I spattered some white acrylic paint over the panel.  I printed one of the sentiments from the digital set, cut it into a strip, and adhered it with foam tape.  It's a very clean and simple card but I usually struggle with floral images so I'm happy with the way it turned out.

Copics:  R32, R30, R00; V12, V01, V000; G28, G24, G21, G20

Thanks so much for stopping by.  

Hugs, Anita   

Thursday, September 9, 2021

You Are My Happy

Good morning friends!  Today I'm sharing a card featuring stamps and dies from the new Crafty Meraki Mini Release!  


I began my mini slimline card with a 3.5" x 6.25" card base.  I cut a piece of bristol and sponged it with Tea Dye and Salvaged Patina Distress Oxide Inks.  I used the new Frame-Worthy Mini Slimline Die to cut a frame from white cardstock.  I stamped a sentiment from the Valentine stamo set on my inked background and then adhered the white diecut frame with foam tape.


I stamped images from the adorable new Puff To The Beach stamp set, colored them with copics, and diecut them using the coordinating dies.  I adhered all the colored images with foam tape.


Copics:
Puffins - N8, N6, N4, N3; C1, C00; R20, R00; Y38, Y35, Y32
Lighthouse - W3, W1, W0; R37, R35, R32
Lobster - R35, R32, R30
Star Fish - YR68, YR65, YR61
Hills - E35, E33, E31; YG17, YG03, YG01
Water - B05, 02
Cloud - BG11, BG10

Thanks so much for stopping by.

Hugs, Anita

Tuesday, September 7, 2021

Have A Beary Happy Birthday

Hello friends!  Today I'm sharing a card I made for the My Favorite Things Color Challenge 172.  


I used the BB Cool Day stamp set for today's card.  I stamped the images on Neenah cardstock, colored them with copics, and then diecut them using the coordinating die-namics.  I used a black glaze pen on the bear's eyes and nose and I applied Nuvo Crystal Glaze to the tiny heart. 


I diecut a panel from bristol card using the Wonky Stitched Rectangle STAX Die-namics.  I sponged the panel with Peacock Feathers Distress Oxide Ink and then spattered on some white paint.  Once the panel was dry, I adhered it to a grey cardbase.  I adhered all the images with foam tape.

Copics:
Bear - E51, E50; R20, R00 
Bear Scarf & Hat - BG75, BG53, BG000; V15, V12, V01
Sign - E51, E50; C3, C1, C00; V15, V12, V01; BG11, BG10, BG000
Ice - BG11, BG10, BG000

Thanks so much for stopping by!  Have a great day!

Hugs, Anita

Monday, September 6, 2021

Halloween Greetings

Hello friends!  Today I'm sharing a card I made for the My Favorite Things Wednesday Sketch Challenge 557.


I used the adorable witch from the Witch Way Is The Candy stamp set for my card today.  This is one of my favorite Halloween stamp sets and I've used this sweet little witch sooo many times!  I stamped her on Neenah cardstock, colored her with copics, and diecut her using the coordinating die-namics


I sponged Blueprint Sketch, Chipped Sapphire, Wilted Violet, and Black Soot Distress Oxide Inks onto a panel of bristol card.  I spattered it with white acrylic paint.  I diecut a star from bristol and sponged it with Fossilized Amber, Spiced Marmalade, and Crackling Campfire Distress Oxide Inks.  I spattered the star with both white and black acrylic paint.  I adhered the star directly to my card and adhered the witch with foam tape.  I heat-embossed a sentiment from the stamp set and also adhered it with foam tape.

Copics:
Skin - E13, E11, E21, E00, E000, R20
Hair - E37, E99, E97, YR21
Clothes - V17, V15, V12, V01; YG17, YG03, YG01; YR09, YR07, YR04; N8, N6, N4
Broom - E27; YR23, Y19, Y11

Thanks so much for stopping by!

Hugs, Anita

Happy Bird-Day

Good morning friends!  Today I'm sharing a fun slimline birthday card featuring a new stamp set from Paperie Ink


My slimline card measures 3.5" x 8.5".  I used the Crafty Meraki Times Square Para-Dies to cut the front cover from white cardstock.  I stamped a sentiment from the Happy Bird Day stamp sentiment on the cover.   I sponged some bright Distress Oxide Inks onto my card behind the four diecut squares.  I spattered the inks with water and white acrylic paint.  Once the card front was dry, I adhered the white cardstock cover with foam tape.  


I stamped images from the Owl About Me stamp set on Neenah cardstock, ran them through my ScanNCut, and colored them with copics.  I used a black glaze pen on the owl eyes and I used a Wink Of Stella Clear Glitter Pen on the party hats and gifts.  I adhered the images with foam tape.


I stamped one of the sentiments from the stamp set and then adhered the front cover and the colored images with foam tape for added dimension.


Copics:
Owls - E31, E30, E50; Y38; B000
Tree Branch - E29, E27, E23; YG17, YG03, YG01
Blue - BG05, BG01, B000
Purple - V15, V12, V01
Pink - RV14, RV13, RV11
Orange - Y38, Y35, Y32
Green - YG17, YG03, YG01

Thank you so much for stopping by.  I hope you have a wonderful week!

Hugs, Anita

Thursday, September 2, 2021

You Make My Heart Sing

Good morning friends!  Today I'm sharing a card featuring stamps and dies from the new Crafty Meraki Mini Release!  

My mini slimline card measures 3.5" x 6.25".  I cut a piece of bristol card, sponged it with Peacock Feathers and Mowed Lawn Distress Oxide Inks, and adhered it to my card front.  Next I used the Crafty Meraki Mini Slimline Bar None Die to cut the cover from white cardstock.  I stamped a sentiment from the Valentine stamp set on the diecut cover and then adhered it with foam tape. The images are from the new Tou The Tropics stamp set.  I colored them with copics, diecut them using the coordinating dies, and adhered them to my card.  I used a white gel pen to add highlights to the images.  

Copics:

Toucans - Y08, Y06, Y02, Y00; N8, N6, N4, N3; BG09, BG05, BG01, B000; RV17, RV14, RV13; YG17, YG03, YG01; YR09, YR07, YR04, YR02; Y18

Branch - E29, E27, E23

Greenery - YG17, YG03, YG01; BG78, BG75, BG72; G28, G24, G21

Flowers - R89, R85, R83, R81; Y08, Y06, Y02

Thanks so much for stopping by!  Have a great day!

Hugs, Anita